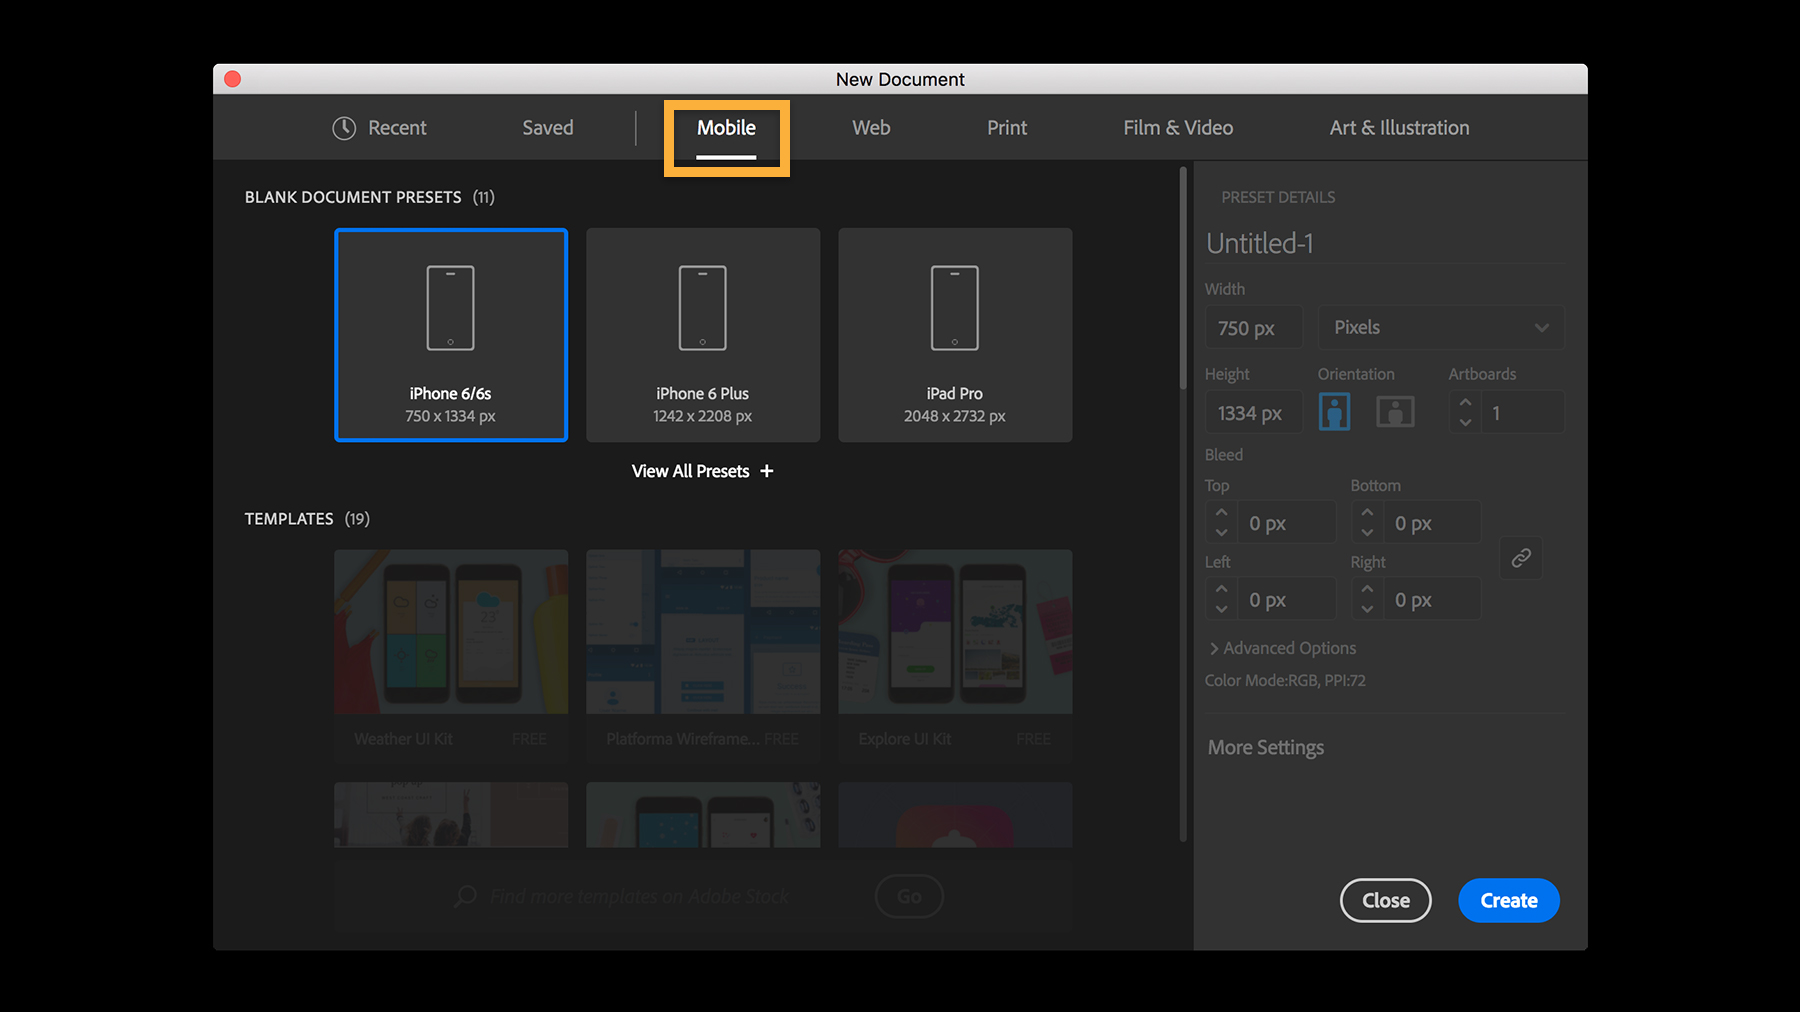
1. Upon launching Illustrator, you’ll see the Start workspace. Click Create new to open the New Document dialog box. Or simply press Control+N (Windows) or Command+N (macOS).

2. Select a category at the top such as Print, Mobile, or Web. These general categories start you off on the right foot by setting up some parameters for your project, like the best color mode and resolution.

Tip: Consider your project before choosing a category. For example, choose Print if you’re designing a flyer, business card, or logo; choose Web if you plan to work on a web banner, social graphic, or art for your blog. If you’re unsure of the final destination, select Art & Illustration and customize the settings for your project.
3. Once you select a category, you’ll find many presets for commonly used document types. A preset is a handy starting point that creates a blank document using predefined dimensions and settings. For example, after picking Mobile, you can click a preset to quickly start designing for the iPad Pro.

4. You can customize your document in many ways, whether or not you picked a preset. In Preset Details on the right, you can specify exact dimensions, change measurement units and page orientation, or add
a print bleed.

Alternatively, you can jump-start your designs with a high-quality template. If you scroll in the main part of the New Document dialog box, you’ll find free templates with rich designs for a variety of projects, and you can download hundreds more from Adobe Stock too.
5. When you’re ready, click Create. This opens a new document with a blank artboard that is ready for your designs.

Now that your first document is open, you can change its settings anytime. Try making some of these easy edits:
An artboard in Illustrator works like a piece of paper on your desk. Artboards can be of any size and your document can contain multiple artboards in different sizes — so you can conveniently design for different
projects and output sizes at once.
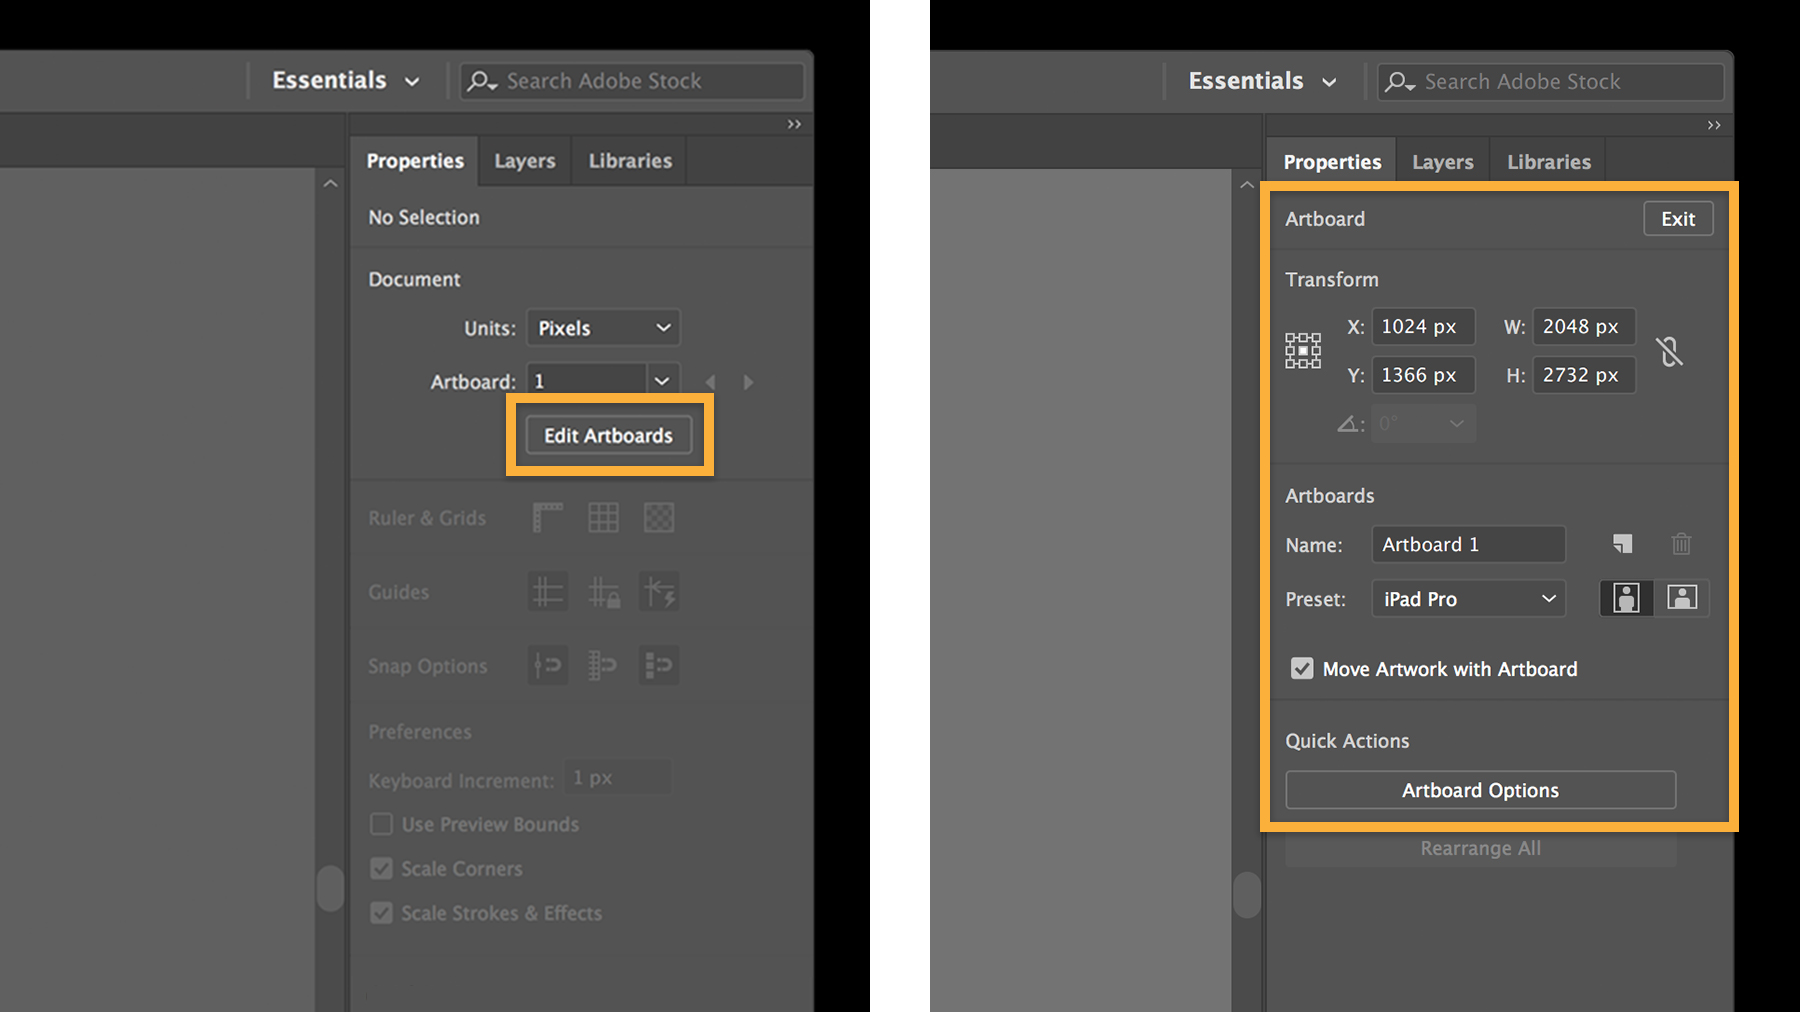
Go to Window > Properties. With nothing selected in your document, click Edit Artboards.
You can edit the width and height of the artboard by typing new values under Transform in the Properties panel. Click the New Artboard icon to create additional artboards. Click an artboard to select it — now you can manually adjust its size by dragging the widgets, or press the Delete key to remove it.
When you’re done, press Esc or click the Exit button at the top of the Properties panel.

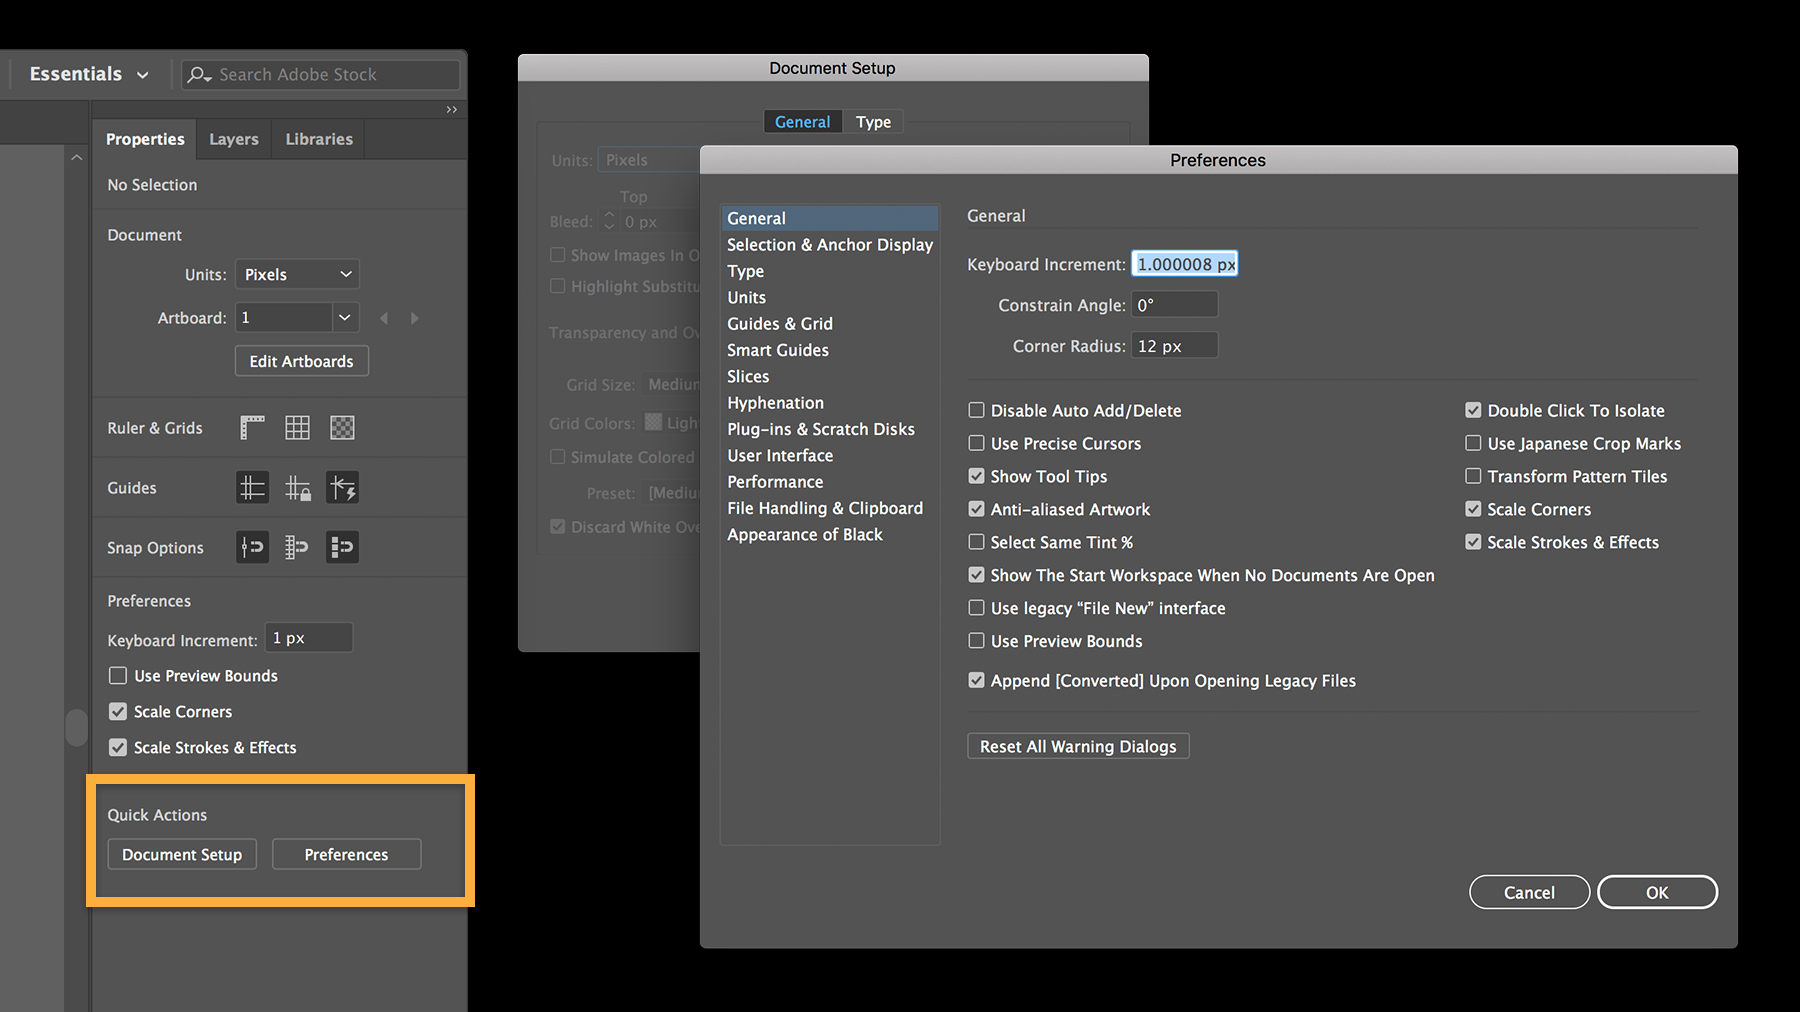
It’s just as easy to make a global change to your entire document consisting of multiple artboards. In the Properties panel, click Document Setup under Quick Actions. Change the units or bleed settings, and then click OK.
Or click Preferences in the Properties panel to quickly access and change any of the Illustrator application settings to your liking. (Your edited Preferences are saved when you quit Illustrator.)


No comments:
Post a Comment